
Vertical wood siding installations gained traction in the 60s and 70s as builders used budget-friendly T1-11 siding to clad homes in subdivisions across the U.S. While T1-11 siding has largely fallen by the wayside because of poor performance, vertical installation is still a trendy choice. The demand for vertical installations has risen steadily over the years because it complements most design styles.
This article highlights a critical vertical installation mistake, and reading this may be your only chance to avoid it, because you can’t plan for what you don’t know.
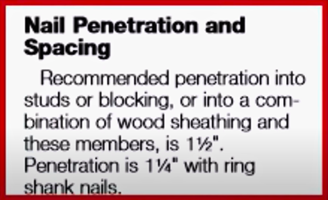
The hugely important, but very short notation on nailing requirements is buried on page 8 of the 12-page Technical Guide for Natural Wood Siding. It states the required nail-length penetration for proper installation and recommends nailing into studs or horizontal blocking in addition to the sheathing and siding. As we move through this article, you’ll see why this information matters.
Ninety percent of siding is installed horizontally, and you don’t worry about what you’re nailing the siding to because vertical stud walls sit behind the sheathing. You never have to think about how the inside of your stud wall affects the siding.
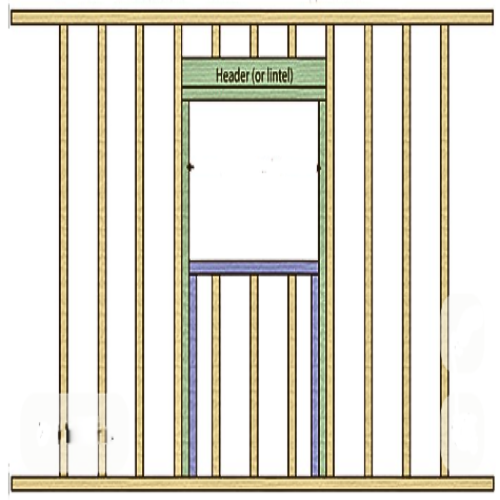
But on a vertical installation, you have to think about what you're nailing the siding to, preferably at the design stage, and last chance, at the framing stage. You don’t get another chance to put horizontal blocks in the wall. That’s why we’re writing this article – for vertical installs, you have to know what to plan for in advance, or you can’t plan for it.
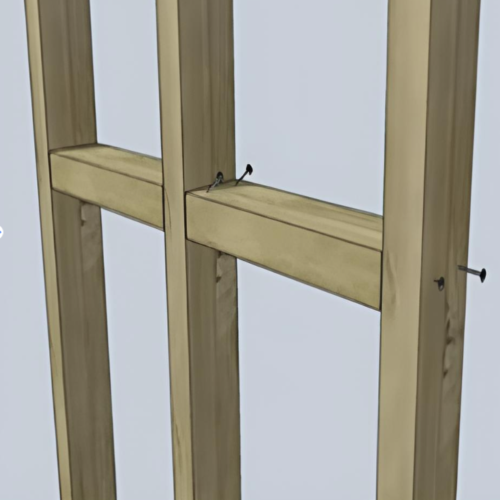
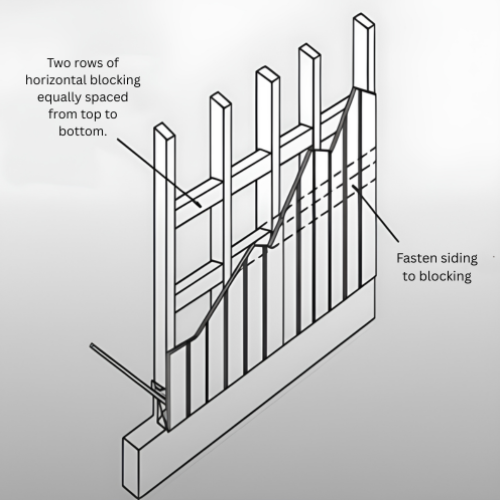
My first question to anyone calling about vertical installation is: do you have horizontal blocking in the stud walls? At least 80% of the people tell me they don’t. When I ask them what they are going to nail the siding to, the answer is always, “I’m going to nail it to the sheathing.” Thinking you should nail it to the sheathing is a major mistake.
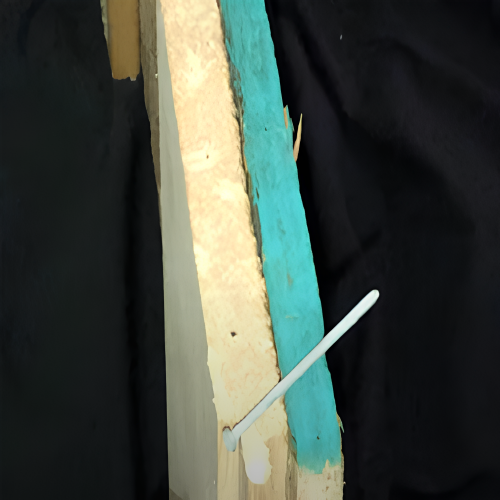
As you can see in the photo above, nailing the siding only to the sheathing leaves the nails with nothing to bite into. Wood moves constantly with weather and temperature changes, putting pressure on the nails, and they will eventually work loose, causing the board to move, cup, twist, or pop out of the groove. Without horizontal blocking, you’ll need to attach furring strips for proper nail penetration, as shown below.
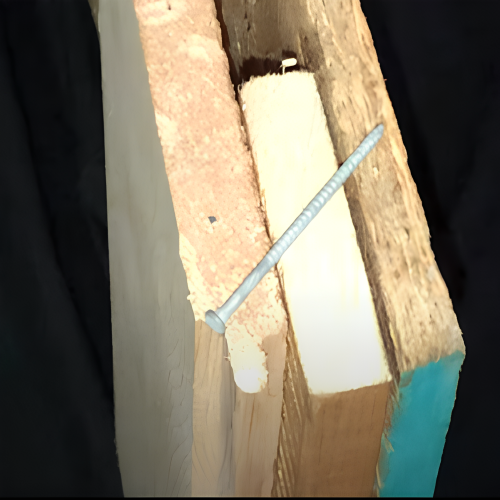
Next, I’ll ask if they’ve installed the trim. I ask because a good installer will trim before installing siding, and most of the time, the trim’s done. This is the point when they realize installing furring strips will cause an issue with the trim they just finished. Once the siding is on, it will protrude past your trim. You must find a way to achieve proper nail penetration with the trim protruding past the siding. A decision needs to be made. Do you pull off all the trim or shim it? Dennis, our master installer, suggests trimming over the trim.
This article matters because eight out of 10 people have already made these mistakes by the time they call. I can hear the builder or installer on the other end of the phone thinking he’ll nail it to the sheathing. “That’s 3/4 of an inch, and there’s lots of nails; it’s good enough.” They don’t want to deal with it, and nobody will find out unless something goes sideways. If boards start pulling out, it'll be epic. If the wood moves and only a few boards pull up, you have to replace the whole wall to fix it. On a vertical install, you can’t replace a couple of boards in the middle of the wall, especially with a hidden fastening system. By then the builder is long gone, and the homeowner is out of luck. I know from experience it is impossible to convince a builder to make the proper fix after the trim’s installed when he doesn’t have the time, money, or inclination.
Because I haven't seen this mistake highlighted in any installation instructions, it’s easy to make, and that’s why it happens so often.
Don’t forget that when you nail directly to the sheathing, you leave no room for water to drain or dry on the backside, increasing the risk of rot. Since the boards are pointed downward in a vertical installation, you create a major rot threat from top to bottom through the very nail holes we’re talking about. An air gap is not a suggestion; it’s a requirement.
Vertical installations are beautiful and easy, but you need to know that horizontal blocking is required either during planning or at the stud-wall stage. If you miss those opportunities, you'll have to install furring strips before the trim goes up.
We hope this article reaches builders, installers, and homeowners before they get into this situation.
If you’re hiring an installer, choose an experienced installer (https://www.buffalo-lumber.com/lumber-articles/how-to-choose-the-right-wood-siding-installer/). Knowing which questions to ask and what answers to expect sets you up for success.
Take a few minutes to watch the Installation Foundation Series (https://www.buffalo-lumber.com/siding-installation-videos/) for planning tips to help you complete a successful vertical wood siding installation.
For more information on wood siding and installation, contact ( https://www.buffalo-lumber.com/contact/ ) our in-house mill specialist.
20,000+ Consults ~ 2,000+ Projects ~ 200+ Jobsite Visits ~ 19,000+ Hours
Working with architects, designers, builders, and homeowners on custom-milled, factory-finished wood.
Let us know how we can help you today.
877-960-9663